วันอาทิตย์ที่ 21 ตุลาคม พ.ศ. 2561
mysql-master-slave-replication
https://www.tecmint.com/how-to-setup-mysql-master-slave-replication-in-rhel-centos-fedora/
mysql-configuration-file-sample
https://www.fromdual.com/mysql-configuration-file-sample
# # FromDual configuration file template for MySQL, Galera Cluster, MariaDB and Percona Server # Location: /etc/my.cnf or /etc/mysql/my.cnf # This template is intended to work with MySQL 5.6 and newer and MariaDB 10.0 and newer # Get most recent updated from here: # http://www.fromdual.com/mysql-configuration-file-sample # [client] port = 3306 socket = /var/run/mysqld/mysql.sock # Use mysqld.sock on Ubuntu, conflicts with AppArmor otherwise [mysql] no_auto_rehash max_allowed_packet = 16M prompt = '\u@\h [\d]> ' # 'user@host [schema]> ' default_character_set = utf8 # Possibly this setting is correct for most recent Linux systems [mysqldump] max_allowed_packet = 16M [mysqld_safe] # Becomes sooner or later obsolete with systemd open_files_limit = 8192 # You possibly have to adapt your O/S settings as well user = mysql log-error = <hostname>_error.log # Adjust AppArmor configuration: /etc/apparmor.d/usr.sbin.mysqld [mysqld] # Connection and Thread variables port = 3306 socket = /var/run/mysqld/mysql.sock # Use mysqld.sock on Ubuntu, conflicts with AppArmor otherwise # basedir = /usr # datadir = /var/lib/mysql # tmpdir = /tmp # innodb_tmpdir = /var/lib/mysql # MySQL 5.7 max_allowed_packet = 16M default_storage_engine = InnoDB # explicit_defaults_for_timestamp = 1 # MySQL 5.6, test carefully! This can have an impact on application. # disable_partition_engine_check = true # Since MySQL 5.7.17 to 5.7.20. To get rid of nasty message in error log # character_set_server = utf8 # If you prefer utf8 # collation_server = utf8_general_ci max_connections = 505 # Values < 1000 are typically good max_user_connections = 500 # Limit one specific user/application thread_cache_size = 505 # Up to max_connections makes sense # Query Cache query_cache_type = 1 # Set to 0 to avoid global QC Mutex query_cache_size = 32M # Avoid too big (> 128M) QC because of QC clean-up lock! # Session variables sort_buffer_size = 2M # Could be too big for many small sorts tmp_table_size = 32M # Make sure your temporary results do NOT contain BLOB/TEXT attributes read_buffer_size = 128k # Resist to change this parameter if you do not know what you are doing read_rnd_buffer_size = 256k # Resist to change this parameter if you do not know what you are doing join_buffer_size = 128k # Resist to change this parameter if you do not know what you are doing # Other buffers and caches table_definition_cache = 1400 # As big as many tables you have table_open_cache = 2000 # connections x tables/connection (~2) table_open_cache_instances = 16 # New default in 5.7 # MySQL error log log_error = <hostname>_error.log # Adjust AppArmor configuration: /etc/apparmor.d/usr.sbin.mysqld # log_timestamps = SYSTEM # MySQL 5.7, equivalent to old behaviour log_warnings = 2 # log_error_verbosity = 3 # MySQL 5.7, equivalent to log_warnings = 2 # innodb_print_all_deadlocks = 1 # wsrep_log_conflicts = 1 # for Galera only! # Slow Query Log slow_query_log_file = <hostname>_slow.log # Adjust AppArmor configuration: /etc/apparmor.d/usr.sbin.mysqld slow_query_log = 0 log_queries_not_using_indexes = 0 long_query_time = 0.5 min_examined_row_limit = 100 # General Query Log general_log_file = <hostname>_general.log # Adjust AppArmor configuration: /etc/apparmor.d/usr.sbin.mysqld general_log = 0 # Performance Schema # performance_schema = ON # on some older MariaDB 10 releases performance_schema_consumer_events_statements_history_long = ON # MySQL 5.6 and newer # Binary logging and Replication server_id = 42 log_bin = <hostname>_binlog # Locate outside of datadir, adjust AppArmor configuration: /etc/apparmor.d/usr.sbin.mysqld # master_verify_checksum = ON # MySQL 5.6 binlog_cache_size = 1M binlog_stmt_cache_size = 1M max_binlog_size = 128M # Make bigger for high traffic to reduce number of files sync_binlog = 0 # Set to 1 or higher to reduce potential loss of binary-log data expire_logs_days = 5 # We will survive easter holidays binlog_format = ROW # Use MIXED if you experience some troubles # binlog_row_image = MINIMAL # Since 5.6 # auto_increment_increment = 2 # For Master/Master set-ups use 2 for both nodes # auto_increment_offset = 1 # For Master/Master set-ups use 1 and 2 # Slave variables log_slave_updates = 1 # Use if Slave is used for Backup and PiTR read_only = 0 # Set to 1 to prevent writes on Slave # super_read_only = 0 # Set to 1 to prevent writes on Slave for users with SUPER privilege. Since 5.7 # skip_slave_start = 1 # To avoid start of Slave thread # relay_log = <hostname>-relay-bin # relay_log_info_repository = table # MySQL 5.6 # master_info_repository = table # MySQL 5.6 # slave_load_tmpdir = '/tmp' # Crash-safe replication Master # binlog_checksum = CRC32 # default # sync_binlog = 1 # default since 5.7.6, but slow! # innodb_support_xa = 1 # default, depracted since 5.7.10 # Crash-safe replication Slave # master_info_repository = TABLE # relay_log_info_repository = TABLE # relay_log_recovery = 1 # sync_relay_log_info = 1 # relay_log_purge = 1 # default # slave_sql_verify_checksum = 1 # default # GTID replication # gtid_mode = ON # Master and Slave # enforce_gtid_consistency = 1 # Master and Slave # log_bin = %INSTANCEDIR%/binlog/%UNAME%_%INSTANCE%_binlog # In 5.6 also on Slave # log_slave_updates = 1 # In 5.6 also on Slave # Security variables # local_infile = 0 # If you are security aware # secure_auth = 1 # If you are security aware # sql_mode = TRADITIONAL,ONLY_FULL_GROUP_BY,NO_ENGINE_SUBSTITUTION,STRICT_ALL_TABLES,NO_ZERO_IN_DATE,NO_ZERO_DATE,ERROR_FOR_DIVISION_BY_ZERO,NO_AUTO_CREATE_USER # Be careful changing this afterwards # skip_name_resolve = 0 # Set to 1 if you do not trust your DNS or experience problems # secure_file_priv = '/tmp' # chmod 750, adjust AppArmor configuration: /etc/apparmor.d/usr.sbin.mysqld # MyISAM variables key_buffer_size = 8M # Set to 25 - 33 % of RAM if you still use MyISAM myisam_recover_options = 'BACKUP,FORCE' # disabled_storage_engines = 'MyISAM,MEMORY' # MySQL 5.7, do NOT during/before mysql_upgrade, good for Galera! # MEMORY variables max_heap_table_size = 64M # Should be greater or equal to tmp_table_size # InnoDB variables innodb_strict_mode = ON innodb_file_format_check = 1 # innodb_file_format = Barracuda # For dynamic and compressed InnoDB tables innodb_buffer_pool_size = 128M # Go up to 80% of your available RAM innodb_buffer_pool_instances = 8 # Bigger if huge InnoDB Buffer Pool or high concurrency innodb_file_per_table = 1 # Is the recommended way nowadays # innodb_flush_method = O_DIRECT # O_DIRECT is sometimes better for direct attached storage # innodb_write_io_threads = 8 # If you have a strong I/O system or SSD # innodb_read_io_threads = 8 # If you have a strong I/O system or SSD # innodb_io_capacity = 1000 # If you have a strong I/O system or SSD innodb_flush_log_at_trx_commit = 2 # 1 for durability, 0 or 2 for performance innodb_log_buffer_size = 8M # Bigger if innodb_flush_log_at_trx_commit = 0 innodb_log_file_size = 256M # Bigger means more write throughput but longer recovery time # Galera specific MySQL parameter # default_storage_engine = InnoDB # Galera only works with InnoDB # innodb_flush_log_at_trx_commit = 2 # Durability is achieved by committing to the Group # innodb_autoinc_lock_mode = 2 # For parallel applying # binlog_format = row # Galera only works with RBR # query_cache_type = 0 # Use QC with Galera only in a Master/Slave set-up # query_cache_size = 0 # WSREP parameter # wsrep_on = on # Only MariaDB >= 10.1 # wsrep_provider = none # Start mysqld without Galera # wsrep_provider = /usr/lib/galera/libgalera_smm.so # Location of Galera Plugin on Ubuntu ? # wsrep_provider = /usr/lib64/galera-3/libgalera_smm.so # Location of Galera Plugin on CentOS 7 # wsrep_provider_options = 'gcache.size = 1G' # Depends on you workload, WS kept for IST # wsrep_cluster_name = "My cool Galera Cluster" # Same Cluster name for all nodes # wsrep_cluster_address = "gcomm://" # Old bootstrap method # wsrep_cluster_address = "gcomm://192.168.0.2,192.168.0.3" # Start other nodes like this # wsrep_node_name = "Node A" # Unique node name # wsrep_node_address = 192.168.0.1 # Our address where replication is done # wsrep_node_incoming_address = 10.0.0.1 # Our external interface where application comes from # wsrep_sync_wait = 1 # If you need realy full-synchronous replication (Galera 3.6 and newer) # wsrep_slave_threads = 16 # 4 - 8 per core, not more than wsrep_cert_deps_distance # wsrep_sst_method = rsync # SST method (initial full sync): mysqldump, rsync, rsync_wan, xtrabackup-v2 # wsrep_sst_auth = sst:secret # Username/password for sst user # wsrep_sst_receive_address = 192.168.0.1 # Our address where to receive SST # Group Replication parameter # default_storage_engine = InnoDB # Group Replication only works with InnoDB # server_id = %SERVERID% # Should be different on all 3 nodes # log_bin = %INSTANCEDIR%/binlog/%UNAME%_%INSTANCE%_binlog # Locate outside of datadir, adjust AppArmor configuration: /etc/apparmor.d/local/usr.sbin.mysqld # binlog_format = ROW # binlog_checksum = NONE # not default! # gtid_mode = ON # enforce_gtid_consistency = ON # master_info_repository = TABLE # relay_log_info_repository = TABLE # log_slave_updates = ON # slave_parallel_workers = <n> # 1-2/core, max. 10 # slave_preserve_commit_order = ON # slave_parallel_type = LOGICAL_CLOCK # transaction_write_set_extraction = XXHASH64 # loose-group_replication_group_name = "$(uuidgen)" # Must be the same on all nodes # loose-group_replication_start_on_boot = OFF # loose-group_replication_local_address = "192.168.0.1" # loose-group_replication_group_seeds = "192.168.0.1,192.168.0.2,192.168.0.3" # All nodes of Cluster # loose-group_replication_bootstrap_group = OFF # loose-group_replication_single_primary_mode = FALSE # = multi-primary
วันจันทร์ที่ 13 สิงหาคม พ.ศ. 2561
Install MariaDB 10.2 Centos 7
Features of MariaDB
- MariaDB is an open-source and an alternative relational database management software.
- MariaDB is robust, fast and Scalable with rich storage engines.
- MariaDB has new features such as GIS and JSON.
Server Information and Packages
- The Package included: MariadB, Mariadb-server,MariaDB-libs.
- The Daemon Name used is: mariadb.
- Port No: 3306.
- Configuration path: /etc/my.cnf.
Installing Maria DB 10.2 on Centos 7 / RHEL 7
In general, the mariaDB package comes with an installation media in the local repository which we can install, but if we needed to install the latest package we can do it by adding the repository to the yum local repository list. We use this below command and code to add the repository to the yum.
Adding Repo to Yum for MariaDB Installation
Adding the Repo for Centos 7 64 bit
[mariadb]
name = MariaDB
baseurl = http://yum.mariadb.org/10.2/centos7-amd64
gpgkey=https://yum.mariadb.org/RPM-GPG-KEY-MariaDB
gpgcheck=1
Adding the Repo for RHEL 7 64 bit
[mariadb10]
name = MariaDB
baseurl = http://yum.mariadb.org/10.2/rhel7-amd64
gpgkey=https://yum.mariadb.org/RPM-GPG-KEY-MariaDB
gpgcheck=1
Installing MariaDB using Yum Repo’s
We can install the MariaDB using the Yum Repo, as we just added the repository to the local yum below is the command to install the mariaDB using the Yum
# yum groupinstall mariadb*
Loaded plugins: fastestmirror, refresh-packagekit, security
Loading mirror speeds from cached hostfile
 * base: ftp.iitm.ac.in
 * extras: ftp.iitm.ac.in
 * updates: ftp.iitm.ac.in
....
....
.....
....
....
...
....
Downloading packages:
--------------------------------------------------------------------------------------------------------------------------------------------
Total                                                                                                        68 MB/s |  22 MB  00:00:00
Running transaction check
Running transaction test
Transaction test succeeded
Running transaction
Warning: RPMDB altered outside of yum.
Installing : perl-Data-Dumper-2.145-3.el7.x86_64                                                                                     1/13
Installing : unixODBC-2.3.1-10.el7.x86_64                                                                                            2/13
Installing : perl-Net-Daemon-0.48-5.el7.noarch                                                                                       3/13
Installing : 1:perl-Compress-Raw-Zlib-2.061-4.el7.x86_64                                                                             4/13
Installing : perl-Compress-Raw-Bzip2-2.061-3.el7.x86_64                                                                              5/13
Installing : perl-IO-Compress-2.061-2.el7.noarch                                                                                     6/13
Installing : perl-PlRPC-0.2020-14.el7.noarch                                                                                         7/13
Installing : perl-DBI-1.627-4.el7.x86_64                                                                                             8/13
Installing : perl-DBD-MySQL-4.023-5.el7.x86_64                                                                                       9/13
Installing : 1:mariadb-5.5.41-2.el7_0.x86_64                                                                                        10/13
Installing : 1:mariadb-server-5.5.41-2.el7_0.x86_64                                                                                 11/13
Installing : mysql-connector-odbc-5.2.5-6.el7.x86_64                                                                                12/13
Installing : MySQL-python-1.2.3-11.el7.x86_64                                                                                       13/13
Verifying  : 1:mariadb-5.5.41-2.el7_0.x86_64                                                                                         1/13
Verifying  : perl-Compress-Raw-Bzip2-2.061-3.el7.x86_64                                                                              2/13
Verifying  : mysql-connector-odbc-5.2.5-6.el7.x86_64                                                                                 3/13
Verifying  : perl-Data-Dumper-2.145-3.el7.x86_64                                                                                     4/13
Verifying  : MySQL-python-1.2.3-11.el7.x86_64                                                                                        5/13
Verifying  : 1:mariadb-server-5.5.41-2.el7_0.x86_64                                                                                  6/13
Verifying  : 1:perl-Compress-Raw-Zlib-2.061-4.el7.x86_64                                                                             7/13
Verifying  : perl-PlRPC-0.2020-14.el7.noarch                                                                                         8/13
Verifying  : perl-Net-Daemon-0.48-5.el7.noarch                                                                                       9/13
Verifying  : perl-DBI-1.627-4.el7.x86_64                                                                                            10/13
Verifying  : unixODBC-2.3.1-10.el7.x86_64                                                                                           11/13
Verifying  : perl-DBD-MySQL-4.023-5.el7.x86_64                                                                                      12/13
Verifying  : perl-IO-Compress-2.061-2.el7.noarch                                                                                    13/13
Installed:
MySQL-python.x86_64 0:1.2.3-11.el7                mariadb.x86_64 1:5.5.41-2.el7_0         mariadb-server.x86_64 1:5.5.41-2.el7_0
mysql-connector-odbc.x86_64 0:5.2.5-6.el7
Dependency Installed:
perl-Compress-Raw-Bzip2.x86_64 0:2.061-3.el7     perl-Compress-Raw-Zlib.x86_64 1:2.061-4.el7     perl-DBD-MySQL.x86_64 0:4.023-5.el7
perl-DBI.x86_64 0:1.627-4.el7                    perl-Data-Dumper.x86_64 0:2.145-3.el7           perl-IO-Compress.noarch 0:2.061-2.el7
perl-Net-Daemon.noarch 0:0.48-5.el7              perl-PlRPC.noarch 0:0.2020-14.el7               unixODBC.x86_64 0:2.3.1-10.el7
Complete!
Starting the MariaDB Services
Below is the command to start the mariaDB services
# systemctl start mariadb.services
And we needed to add the services to start services at the boot time, we can use the below command to start the mariaDB services at the boot time.
# systemctl enable mariadb.services
Adding the MariaDB ports to allow from Firewall
# firewall-cmd –permanent –add-services=mysql
# firewall-cmd –permanent –add-port=3306/tcp
# firewall-cmd –reload
Securing the mariadb and Setting the Root User Password
By default, the root password for the mariadb is not set and without root password, we cannot log into the database server. Below is the command to set the root password for mariaDB and remove the anonymous users and secure the mariaDB by restricting the remote login for root and remove the test database.
# mysql_secure_installation
/usr/bin/mysql_secure_installation: line 379: find_mysql_client: command not found
NOTE: RUNNING ALL PARTS OF THIS SCRIPT IS RECOMMENDED FOR ALL MariaDB
SERVERS IN PRODUCTION USE!  PLEASE READ EACH STEP CAREFULLY!
In order to log into MariaDB to secure it, we'll need the current
password for the root user.  If you've just installed MariaDB, and
you haven't set the root password yet, the password will be blank,
so you should just press enter here.
Enter current password for root (enter for none):
OK, successfully used password, moving on...
Setting the root password ensures that nobody can log into the MariaDB
root user without the proper authorization.
Set root password? [Y/n] y
New password:
Re-enter new password:
Password updated successfully!
Reloading the privilege tables..
... Success!
By default, a MariaDB installation has an anonymous user, allowing anyone
to log into MariaDB without having to have a user account created for
them.  This is intended only for testing, and to make the installation
go a bit smoother.  You should remove them before moving into a
production environment.
Remove anonymous users? [Y/n] y
... Success!
Normally, root should only be allowed to connect from 'localhost'.  This
ensures that someone cannot guess at the root password from the network.
Disallow root login remotely? [Y/n] y
... Success!
By default, MariaDB comes with a database named 'test' that anyone can
access.  This is also intended only for testing, and should be removed
before moving into a production environment. Install MariaDB 10.2 RHEL 7
Remove test database and access to it? [Y/n] y
- Dropping test database...
... Success!
- Removing privileges on test database...
... Success!
Reloading the privilege tables will ensure that all changes made so far
will take effect immediately. Install MariaDB 10.2 RHEL 7
Reload privilege tables now? [Y/n] y
... Success!
Cleaning up...
All done!  If you've completed all of the above steps, your MariaDB
installation should now be secure.
Thanks for using MariaDB!
Testing the Connection to the MariaDB.
As we have completed the installation and assigned a password for the root user and secure the connection, we needed to test the mariadb by logging into the database. Below is the command to test the mariaDB –
# mysql -uroot -p
Enter password:
Welcome to the MariaDB monitor.  Commands end with; or \g.
Your MariaDB connection id is 10
Server version: 5.5.41-MariaDB MariaDB Server Install MariaDB 10.2 RHEL 7
Copyright (c) 2000, 2014, Oracle, MariaDB Corporation Ab and others.
Type 'help;' or '\h' for help. Type '\c' to clear the current input statement.
MariaDB [(none)]>
วันจันทร์ที่ 28 พฤษภาคม พ.ศ. 2561
MySQL ไม่ start
C:\Program Files (x86)\HOSxP_PCU\MySQL\bin\mysqld.exe -console
จะเกิดปัญหา ไม่สามารถตรวจสอบ hostname.err ไม่มีไฟล์สร้างขึ้นมา
เพราะว่า mysql ไม่ทำงานครับ
InnoDB: Error: log file .\ib_logfile0 is of different size 0 10485760 bytes
InnoDB: than specified in the .cnf file 0 5242880 bytes!
081117 17:36:32 [ERROR] Can’t init databases
081117 17:36:32 [ERROR] Aborting
mariadb error 1067 the process terminated unexpectedly
วันเสาร์ที่ 19 พฤษภาคม พ.ศ. 2561
Restore *.sql หลายๆๆ ไฟล์ เข้าฐานข้อมูลพร้อมกัน
Restore_hos.sh
====== แบบที่ 1 =============================
for i in *.sql
do
echo "file=$i"
mysql -u root Databasename < $i
done
===========================================
=== แบบที่ 2 ================================
====== แบบที่ 1 =============================
for i in *.sql
do
echo "file=$i"
mysql -u root Databasename < $i
done
===========================================
=== แบบที่ 2 ================================
cat somefile.sql | mysql -u <mysqluser> -p <mysqldb>cat *.sql | mysql -u <mysqluser> -p <mysqldb>
วันพฤหัสบดีที่ 1 มีนาคม พ.ศ. 2561
real-time query performance and diagnostics tool for the MySQL database server.
http://www.jetprofiler.com/
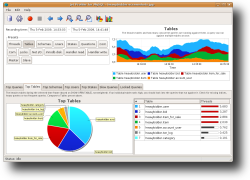
is a real-time query performance and diagnostics tool for the MySQL database server. It's core features:
- Query, table and user performance
- Graphical visualisation
- Low overhead
- User friendly
สมัครสมาชิก:
บทความ (Atom)